Via letsmakerobots.com I have been contacted by marcmart.com an electronics distributor. They asked me about writing a review for a Makeblock product. So I took the chance to write this review.
httpv://www.youtube.com/watch?v=4WdDitRFxC0
Packaging & Delivery
What I got from Marcmart was the Makeblock Robot Starter Kit (including electronics) for free, normal price would be around $130. I want to say many thanks to Marcmart for this great kit. The kit comes arrived as trackable package with singpost from Singapure to Germany in 3 weeks. which is a normal delivery time. Lucky me, I don’t have to pay any customs or taxes. The package arrived in a good condition without any damage.
The robot kit
The robot kit exists of 2 packages, One for the mechanical parts and the other with the electronics parts. No assembly instructions included, these are available at the Makeblock Wiki. The kit includes all mechanical and electronics parts to build 2 different robots, a two wheel drive robot with a caster wheel and a track drive robot. All tools needed are included in the kit, no soldering required:
- screw driver
- 3 hex keys of different sizes
- Mechanic parts
The mechanical parts consists of:
- 4 x aluminum beams of different size
- 2 x 25mm geared DC motors with motor brackets
- 4 x wheels
- 2 shaft connectors
- 2 x tyres, 2x tracks
- caster wheel with bracket
- metric nuts and bolts
To my surprize all the parts have a metric design. This is really good for 95% for people like me living in the metric world, sorry for the rest of the guys living in the imperial world. Most parts are made out of anodized alumnium. The parts looks really durable and well manufactured. There are more small parts included than needed. So you will have some spare parts. especially small parts tend to get lost.
Electronic parts
The electronic parts consists of:
- 1 x Meduino (Arduino Uno R3) clone
- 1 x Meduino shield including motor driver, 8 RJ10 connectors, power and 2 motor terminals
- 1 x acrylic box for Meduino + Shield with spacers
- 1 x ultrasonic sensor
- 1 x infrared receiver + 1 infrared remote
- 2 RJ10 cables (used for sensor connectors)
- 1 battery box for 6 AA cells
The Meduino is a 100% Arduino Uno R3 clone. Not much to say more about it.
[pe2-image src=“http://lh5.ggpht.com/-BEP5bAj7oxE/UxB4r6_lHJI/AAAAAAAAJi8/64Vw2t771Q8/s144-c-o/IMG_9965.JPG“ href=“https://picasaweb.google.com/100614490999857774768/Makeblock#5985416600741026962″ caption=““ type=“image“ alt=“IMG_9965.JPG“ ]
More interesting is the Me Base Shield. It consists of:
TB6612 dual DC motor driver on board.
2 motor terminals
standard power connector and a power switch
0.1″ connectors of all Arduino pins (no headers included)
8 RJ10 connectors for expansion modules. Each expansion module has a color marker. The color of the module must match with the color of the connector on the shield. This avoids wrong wiring.
[pe2-image src=“http://lh3.ggpht.com/-P1Jy3aaznbE/UxB4pylDivI/AAAAAAAAJi0/eWkPNKH-s3c/s144-c-o/IMG_9964.JPG“ href=“https://picasaweb.google.com/100614490999857774768/Makeblock#5985416564122553074″ caption=““ type=“image“ alt=“IMG_9964.JPG“ ]
Meduino and Me Base shield fits perfectly in a laser cutted case out of acrylic.
[pe2-image src=“http://lh3.ggpht.com/-DxH8Hb0EAyE/UwPcGws0DiI/AAAAAAAAJf8/S1dkehdUPE8/s144-c-o/IMG_9613.JPG“ href=“https://picasaweb.google.com/100614490999857774768/Makeblock#5981866738788339234″ caption=“Makeblock Meduino & Meshield“ type=“image“ alt=“IMG_9613.JPG“ ]
Building the 3 wheeled robot
First I built up the 3 wheeled robot. Building time was less than 1 hour. Very easy with the online documentation. So get ready for a test run.
[pe2-image src=“http://lh6.ggpht.com/-JfHA724utWk/UwPcFrfsPmI/AAAAAAAAJf0/TvvcwfIuO4s/s144-c-o/IMG_9609.JPG“ href=“https://picasaweb.google.com/100614490999857774768/Makeblock#5981866720211254882″ caption=“Makeblock robot with wheels“ type=“image“ alt=“IMG_9609.JPG“ ]
Download the Makeblock Library and uploaded the motor test sketch first, to get the motors run into the right direction. Wow, what a smooth sound the motors make. I am really impressed, these are very quiet. And the robot is really fast. For the video I need to slow it down to 40% PWM, to catch the robot on the video. These motors are of good qualtity .
But after a few turns one wheel felt off the motor axis. Ok, I put it back again on the axis, pullled the screw fixed and start a new run. Same problem. Now the screw rotoates through, damn, the thread of the shaft connector has been damaged. To my luck using a longer M3 screw instead of the grub screw helped me out here. Now the wheel is fixed.
[pe2-image src=“http://lh4.ggpht.com/-WUJoTTVSiBE/UwPcIU9TtwI/AAAAAAAAJgE/8G-sr2WmrP4/s144-c-o/IMG_9614.JPG“ href=“https://picasaweb.google.com/100614490999857774768/Makeblock#5981866765701068546″ caption=“Wheel with hub“ type=“image“ alt=“IMG_9614.JPG“ ]
The ultrasonic sensor is the only sensor included in the starter kit and works very well. It has a wide detection range from 3 cm, upto 4m. The only bad thing I can say: On the 3 wheeled robot the sensor the mounting position is to high, smaller obstacles could not be detected.
[pe2-image src=“http://lh5.ggpht.com/-b4SdlKnHg1s/UwPcPFqVmmI/AAAAAAAAJgs/lFFASBA7aN0/s144-c-o/IMG_9623.JPG“ href=“https://picasaweb.google.com/100614490999857774768/Makeblock#5981866881854052962″ caption=“Ultrasonic sensor“ type=“image“ alt=“IMG_9623.JPG“ ]
The second electronic module included in the kit is a infrared receiver. It is used together with an infrared remote for remote control. I mount the module on the robot, but didn’t test the remote. For me the robot should be work autonoumously.
[pe2-image src=“http://lh3.ggpht.com/–eq20bWtNXM/UwPcNiHFJFI/AAAAAAAAJgk/aeZMc1dRbgU/s144-c-o/IMG_9620.JPG“ href=“https://picasaweb.google.com/100614490999857774768/Makeblock#5981866855131063378″ caption=“IR Receiver“ type=“image“ alt=“IMG_9620.JPG“ ]
Building the tracked robot
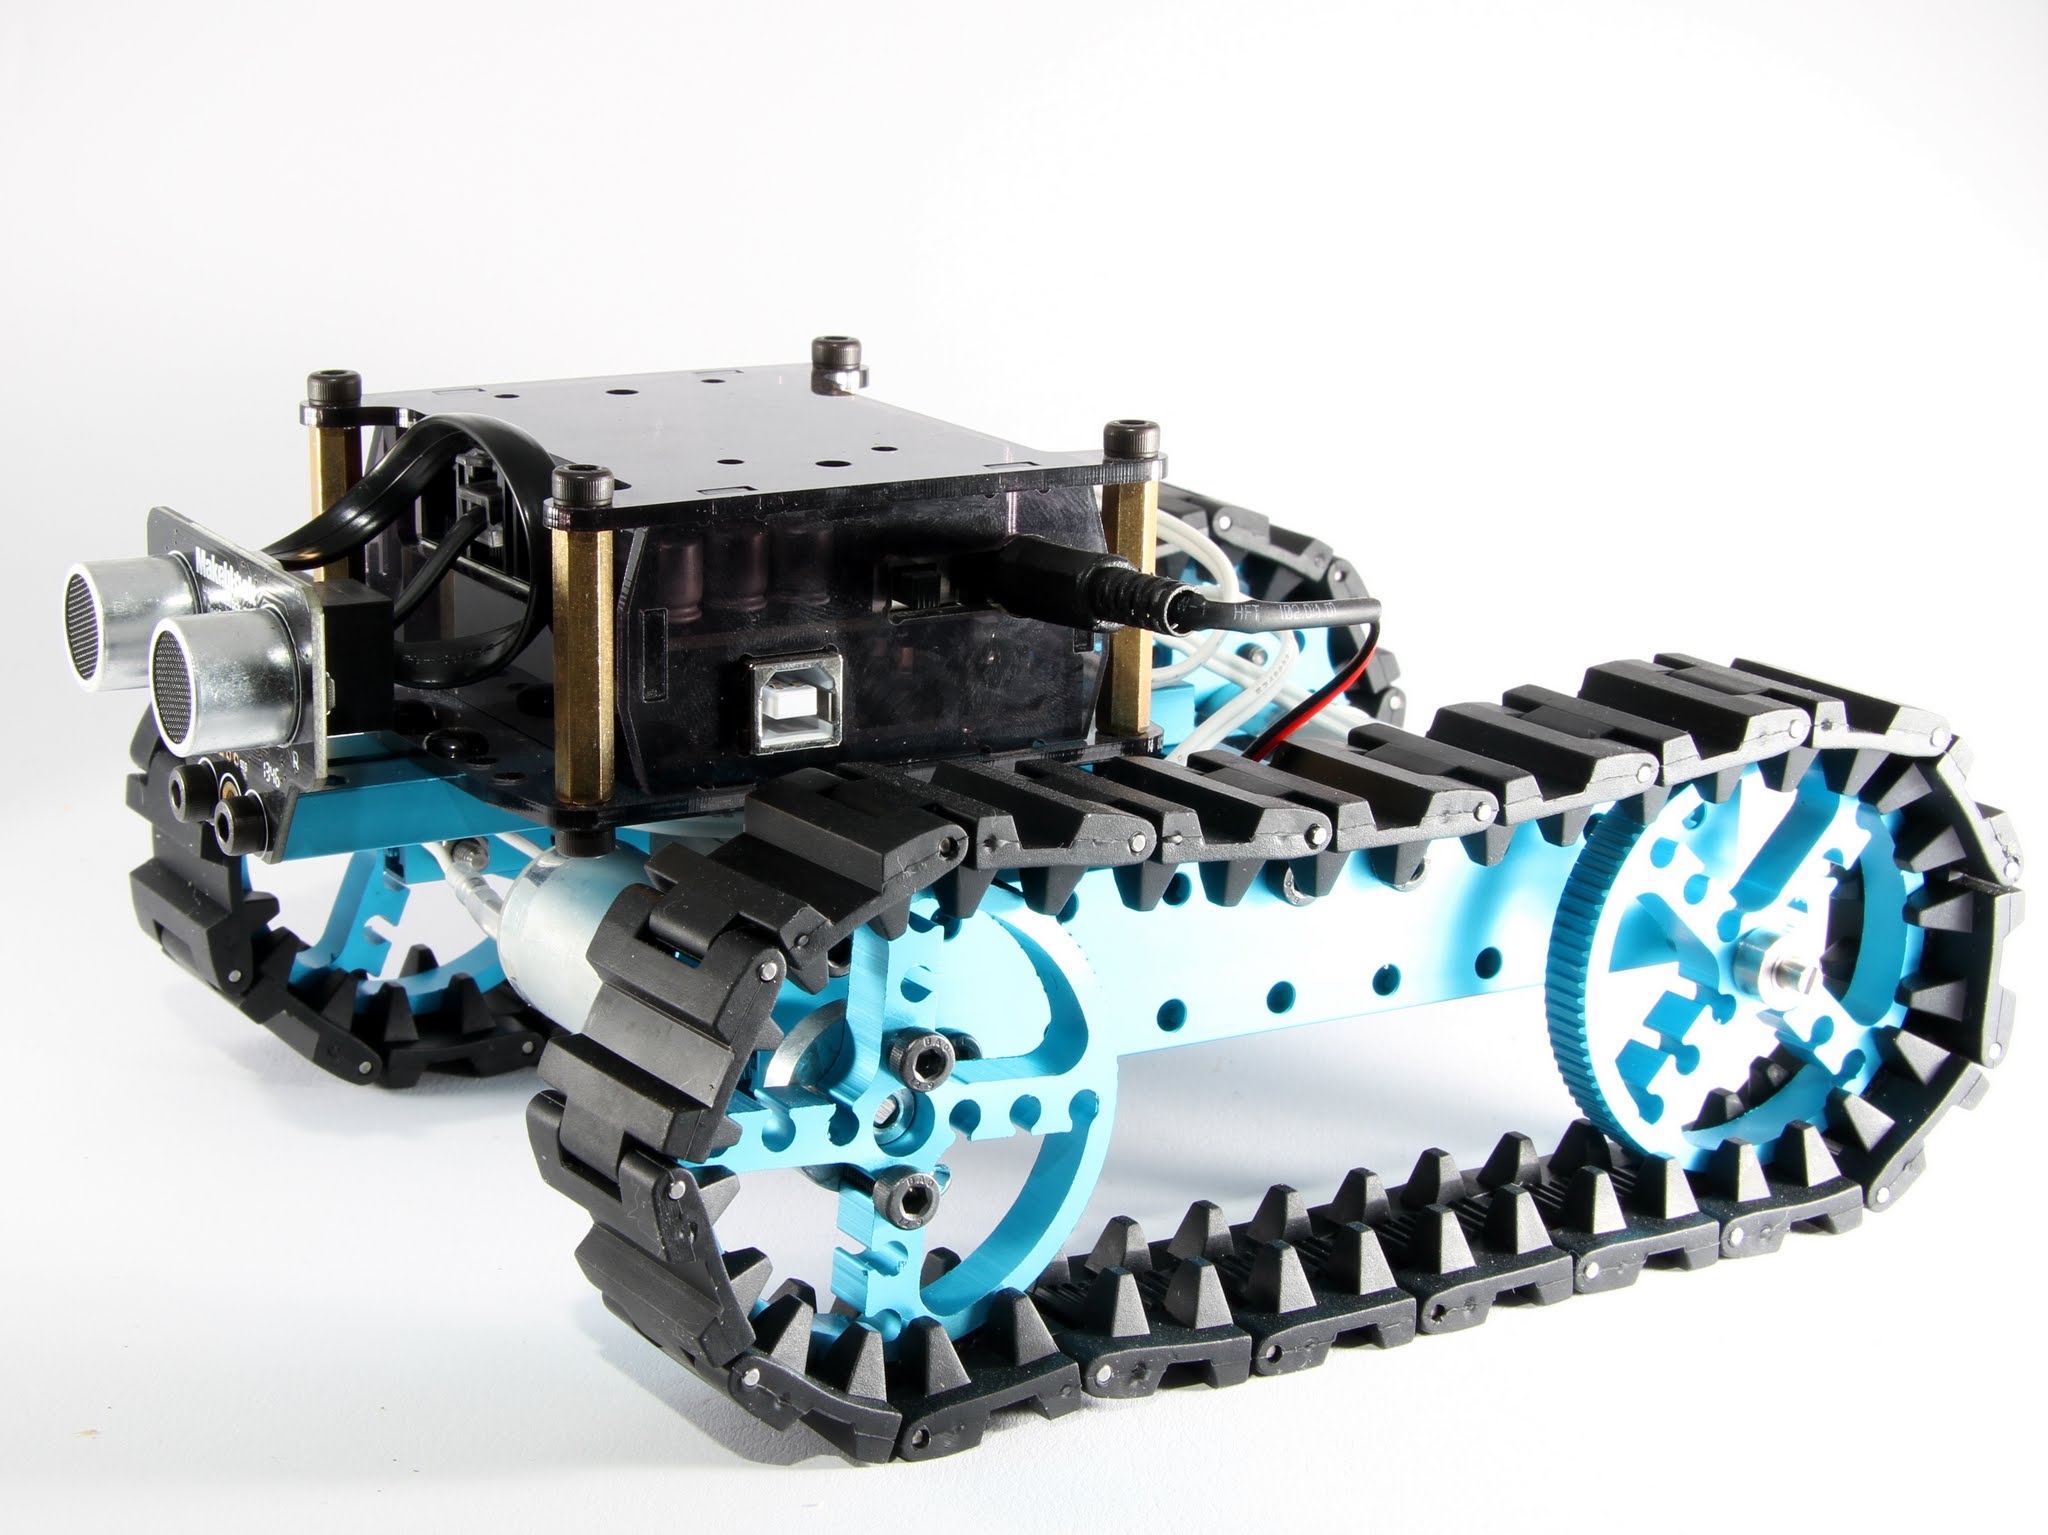
The tracked robot is the second robot you can build with the starter kit. It takes more time than building the 3wheeled robot because of the rubber tracks. The rubber is from good quality and the sound of the rubber tracks is ok. The rubber tend to collect all dust from he floor . So you will have as bonus a cleaning bot.
With the ultrasonic sensor on the deeper position it will detect obstacles better than the 3wheeled robot.
[pe2-image src=“http://lh5.ggpht.com/-sIcYD55RjJA/UwPcV8PC9sI/AAAAAAAAJhM/2v_ArO2TRdE/s144-c-o/IMG_9627.JPG“ href=“https://picasaweb.google.com/100614490999857774768/Makeblock#5981866999582750402″ caption=“Makeblock robot with tracks. Front view“ type=“image“ alt=“IMG_9627.JPG“ ]
[pe2-image src=“http://lh5.ggpht.com/-6FPICHHc0w4/UwPcZKz5iSI/AAAAAAAAJhc/2WI4nkrJCus/s144-c-o/IMG_9629.JPG“ href=“https://picasaweb.google.com/100614490999857774768/Makeblock#5981867055035025698″ caption=““ type=“image“ alt=“IMG_9629.JPG“ ]
Building a 2 wheel balancing robot
First thing that came in my mind, to build a different robot with the parts from the starter kit, was a 2 wheeled balancing robot. Ok I would need an IMU sensor as an extra part, but hopefully nothing more. Don’t know if it work without encoders.
Lets see if this will become a success. Will write about it in an extra project page.
[pe2-image src=“http://lh5.ggpht.com/-lBr6m_yT0e0/UxB4wi1mxWI/AAAAAAAAJjU/gyt_19NsLic/s144-c-o/IMG_9968.JPG“ href=“https://picasaweb.google.com/100614490999857774768/Makeblock#5985416680156087650″ caption=““ type=“image“ alt=“IMG_9968.JPG“ ]
Extensibility
The Makeblock can be expanded with Lego Mindstorms parts. Both systems use the same RJ10 connectors with the same pinout and have the same dimension to plug parts together. You can call Makeblock as ‚Lego for adults‘.
All Makeblock electronic and mechanic parts can be purchased separately.
Using DIY expansisons is also possible. Get a longer RJ10 cable and split in two pieces. The connector pinout can be found at the baseboard schematic
Conclusion
All in all most of the mechanical problems could be fixed. But this should be fixed in a next revision for the kit. A longer test will show how durable the threads in the aluminum parts will be. I harbor little doubt if it is a good idea to use aluminum threads and metal screws.
For the mechanics I will gave 8 out of 10 points
The electronic parts are excellent. The motors are fantastic. Only problem for me is connecting other parts than Makeblock parts.
For the electronics I will gave 9 out of 10 points

